Create and configure a virtual IP address #
What is a virtual IP address? #
A virtual IP address (VIP) is an IP address that can be assigned to multiple instances or serve as a secondary IP address for a network interface.
How does it work? #
To use a VIP to create a fault-tolerant system, you’ll need to install a configure Keepalived, which is a system daemon for Linux. Keepalived uses the Virtual Router Redundancy Protocol (VRRP) to manage the VIP. This protocol allows multiple machines to share a common IP address, and Keepalived uses VRRP to pass the VIP address between the primary machine and the backup machines. When the primary machine fails, the VRRP protocol detects the failure and passes the VIP to one of the backup machines, ensuring that the network service remains available.
To use a VIP as a secondary address for a network interface, you will reserve a VIP and assign it to an instance, first in the settings of our system, then in the settings of the machine. As a result, the VIP becomes the address of the instance, working in conjunction with its regular IP address, allowing the machine to receive and transmit data on behalf of both addresses.
Billing #
A VIP is billed from the moment you reserve it until the moment you delete it. For example, if you reserve an IP address and then delete it after an hour, you will be charged only for an hour of use, regardless of whether the address was assigned to the instance or not.
The monthly price is displayed in the order window.
Create a virtual IP address #
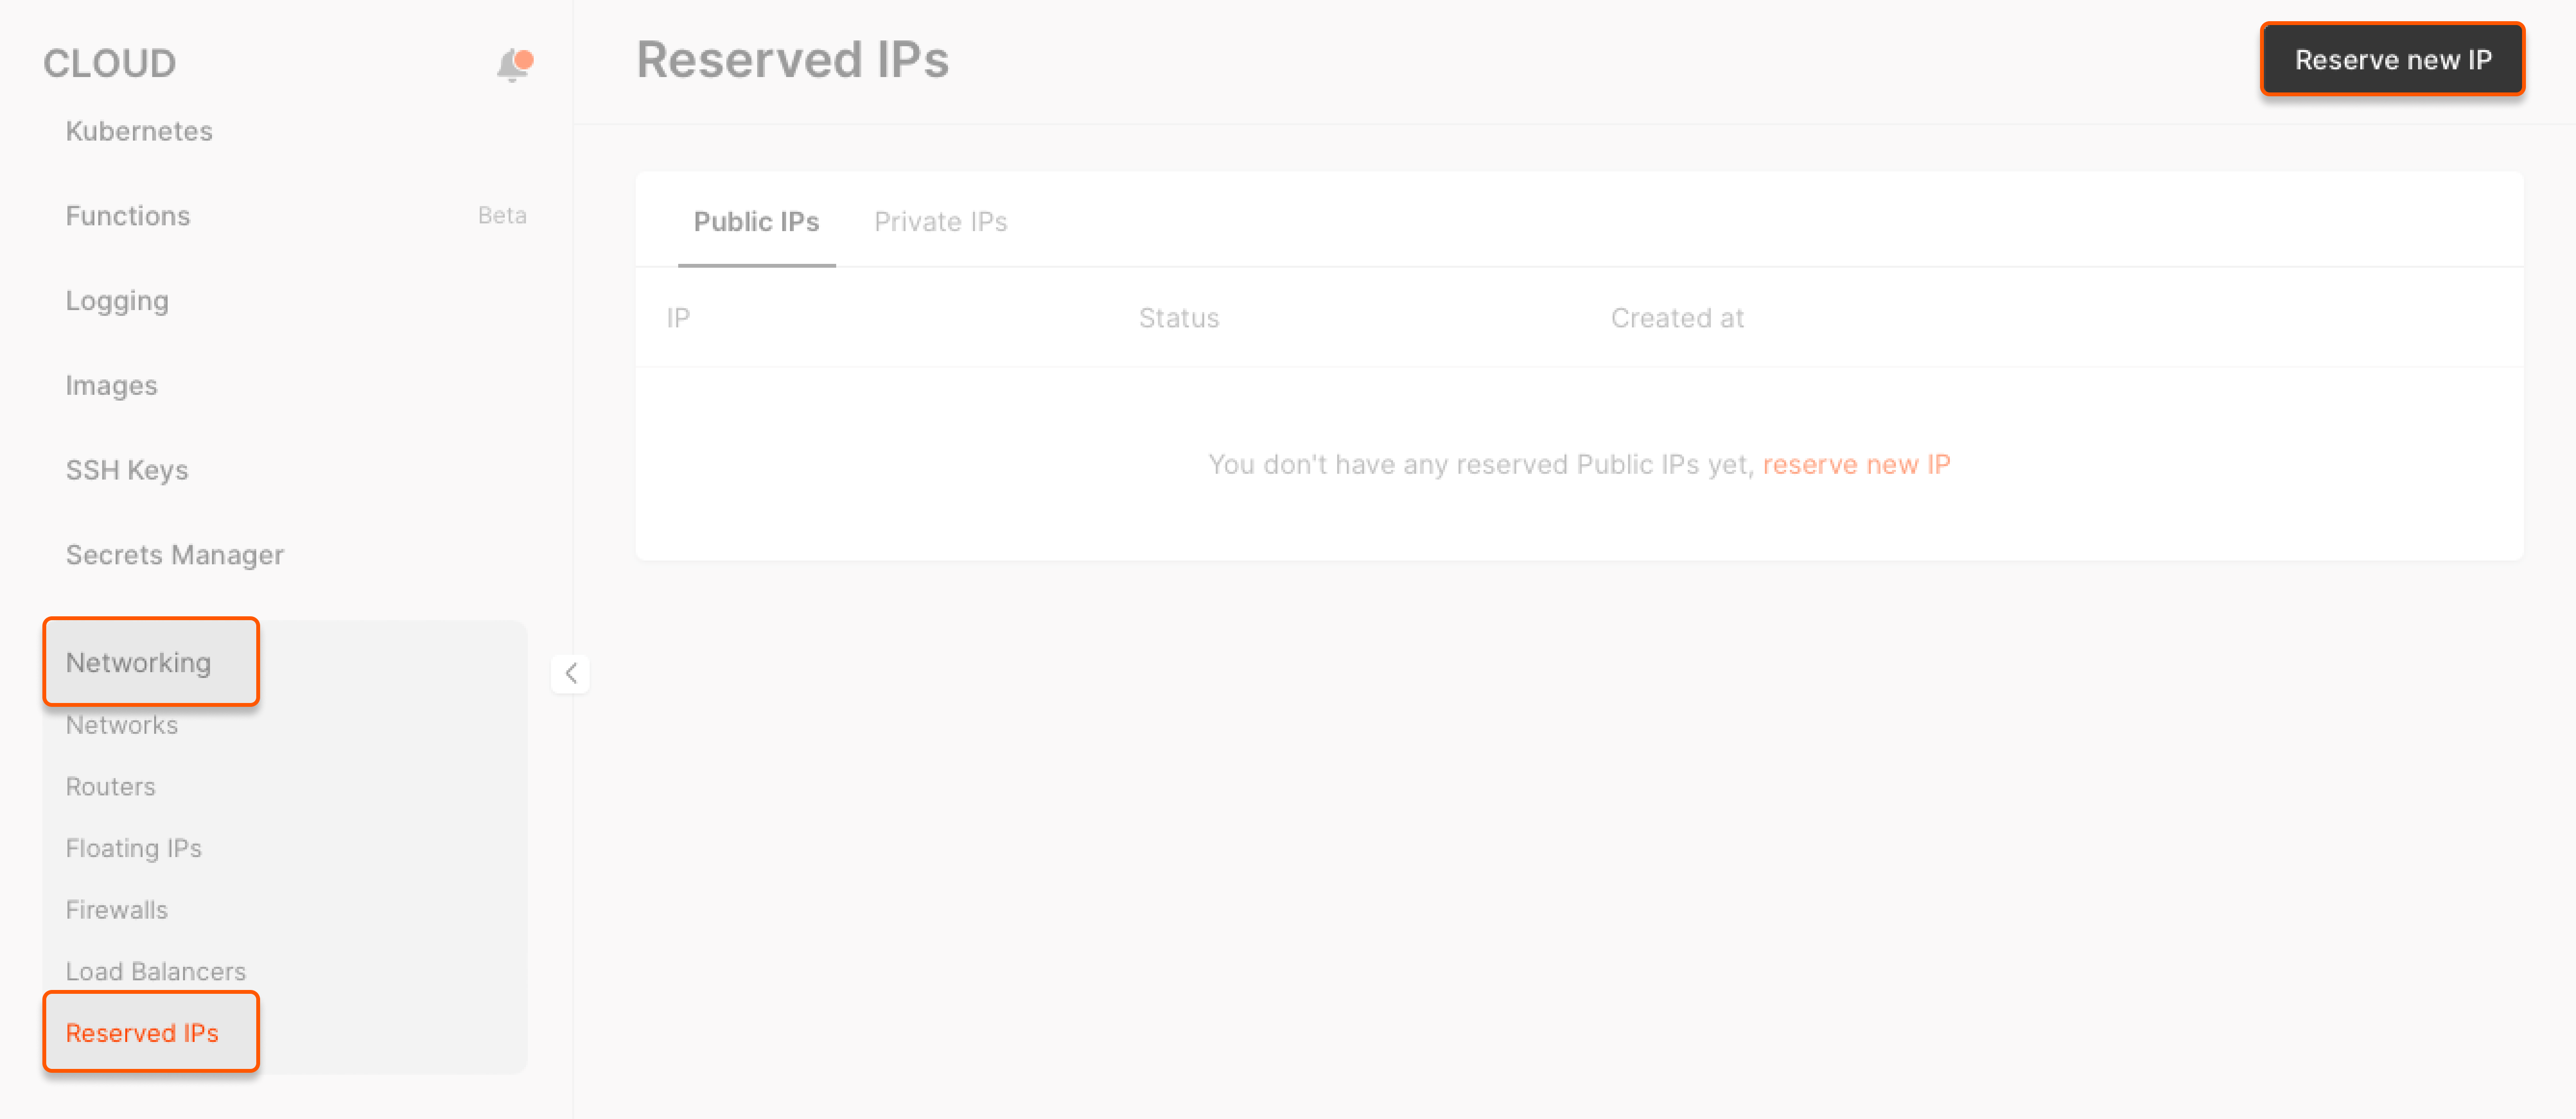
1. In the Cloud menu, go to Networking → Reserved IPs and click Reserve new IP.
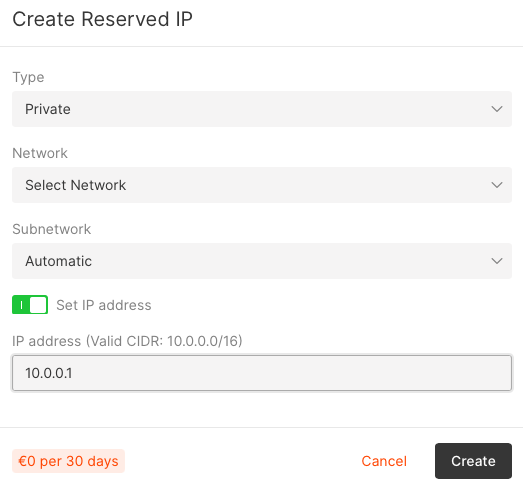
2. In the new window, select the type of an IP address depending on the required network interface: public or private.
If you select Private, specify the network and subnetwork. If you want to reserve a specific IP address, turn on the Set IP address toggle and choose an IP address from the valid CIDR. Otherwise, you will be assigned a random IP address.
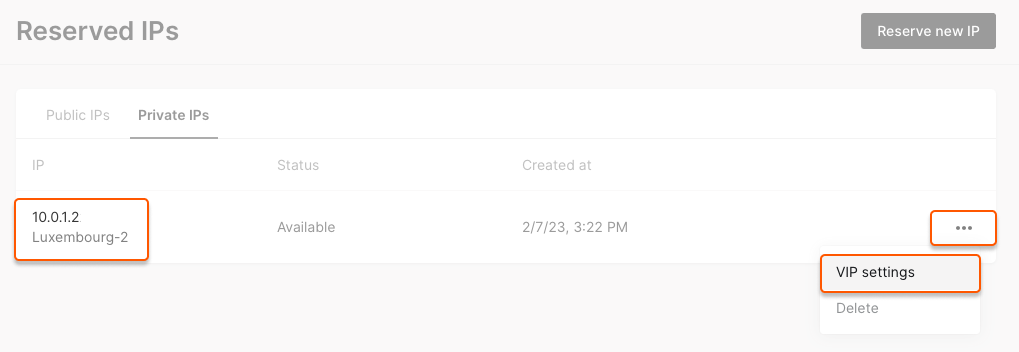
3. Go back to the list of reserved IP addresses, find the required IP address, click ⋯ next to it and select VIP settings.
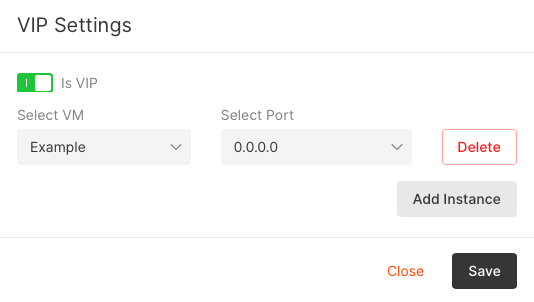
4. In the pop-up window, turn on the Is VIP toggle and click Save.
You have reserved a virtual IP address. You can now assign it multiple machines to create a fault-tolerant system or to add as a secondary address for your network interface.
Assign a virtual IP address to multiple instances #
1. In the Cloud menu, go to Networking → Reserved IPs, find the required virtual IP address, click VIP in the Status column.

2. In the pop-up window, add the required virtual machines, specify their ports and click Save.
3. Install and configure Keepalived on your instances using the official Keepalived documentation.
4. Change the Keepalived configuration file to set the “MASTER” machine and “BACKUP” machines. Additionally, set the priority to determine the order in which the VIP will be transferred between devices. If the master server fails, the IP address will be transferred to the backup machine with the highest priority. If the second machine fails, the VIP will be transferred to the backup machine with the second-highest priority.
5. Run Keepalived on your instance and add it to the autostart list.
You have configured the VIP for your machines, the fault-tolerant system will start working.
Assign a virtual IP address as a secondary address for a network interface #
1. In the Cloud menu, go to Networking → Reserved IPs, find the required virtual IP address, click VIP in the Status column.

2. In the pop-up window, add the required virtual machine, specify its port and click Save.

Now you have to configure the VIP in the instance settings. Below are two guides for Windows and non-Windows instances.
Configure a virtual IP address for non-Windows instances #
1. Connect to your instance.
2. Run the following command as an administrator:
ip addr add **\[VIP\]**/**\[mask\]** dev **\[interface name\]**
where:
- [VIP] is the virtual IP address that you want to add to the interface.
- [mask] is the subnet mask associated with the virtual IP address. You can find it in the Networking tab of your instance.
- [interface name] is the name of the network interface where the IP address will be added. To find the name, run the command:
ip addr
The interface name will appear on the left below the loopback interface.

For example, to add the virtual IP address 192.168.1.200 with a subnet mask of 24 to the eth0 interface, you would use the following command:

Note: the command assigns the VIP to your machine until it restarts. After rebooting, run the command to assign the VIP again. To permanently assign a VIP to an instance, refer to the official documentation of your OS to add the IP address to the system network settings.
The VIP has been configured. To verify it, connect to your instance via SSH using your VIP. If the connection fails, there may be an error in the IP assignment command or the IP address may not have been added inside your system. Repeat the Steps again.
Configure a virtual IP address for Windows instances #
1. Open the Control Panel.
2. Go to the Network and Sharing Center.
3. Right-click the active network connection that you want to add the virtual IP address to and select Properties.
4. Select Internet Protocol Version 4 (TCP/IPv4) and click Properties.
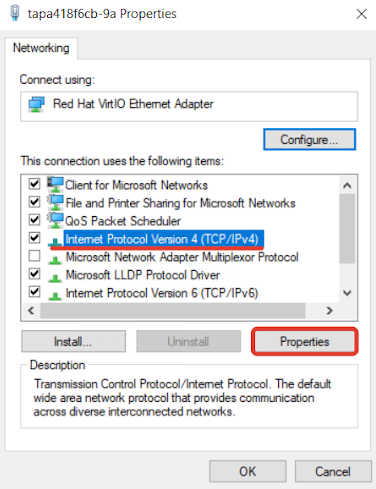
5. Click Use the following IP address option and enter the virtual IP address, subnet mask, and default gateway in the appropriate fields. To find these parameters, run the following command:
ipconfig
You will see the output:
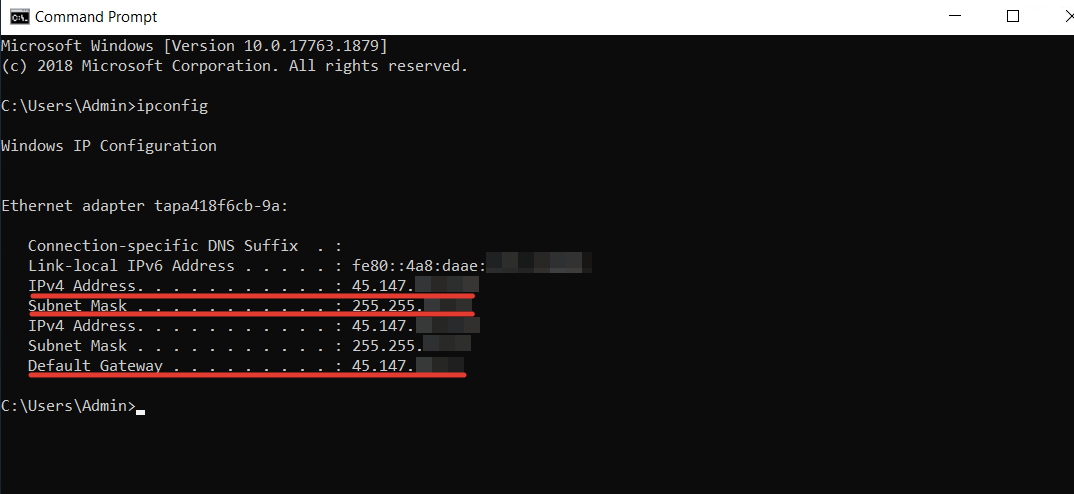
Go back to the Control Panel, make sure the values are correct and click Advanced ….
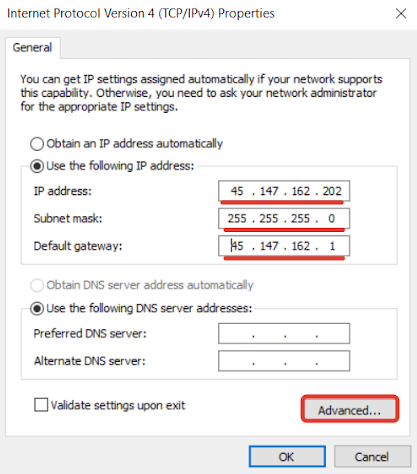
6. In the IP Settings tab, find the IP addresses section and click Add ….

7. In the next window, enter your VIP and the subnet mask from the command line. Then click Add.

8. Click OK.
The VIP has been configured. To verify it, connect to your instance via SSH using your VIP.If the connection fails, there may be an error in the IP assignment command or the IP address may not have been added inside your system. Repeat the Steps.