Upload a PKCS12 file #
Secrets Manager is a tab where you can upload PKCS12 files (called secrets in the system) to. They are needed to create Load Balancers with HTTPS listeners.

What PKCS12 file is #
PKCS12 (Public-Key Cryptography Standards) is a binary format for storing SSL/TLS certificate, certificate chain, and private key in one encrypted file.
Basically, you “pack” the main SSL/TLS certificate, the certificate chain, and the private key into the PKCS12 file to transfer them easily. Each element is essential for establishing an HTTPS connection:
- The main certificate is a digital signature of the site, which confirms that the resource actually belongs to you and not to criminals who impersonate you.
- The certificate chain is information about the CAs (certificate authorities) that participated in the issuance of your certificate and confirm its authenticity.
- The private key is a unique set of letters and numbers (key), using which the cryptographic algorithm will encrypt all data exchanged between the resource and a user.
After receiving the PKCS12 file, our system will be able to open an HTTPS connection. You only need to put the files associated with the certificate in base64 encoded PKCS12 file and upload it to the Secrets Manager.
How to create a PKCS12 file #
1. Prepare certificate files #
You need the SSL/TLS certificate for the domain, the chain of certificates, and the private key. The domain must be configured with a DNS A record with the virtual IP address of the load balancer (the IP is specified in the Load Balancers tab). If you are using our DNS zone, you can create an A record according to the instructions. Your domain will send requests to the IP of the balancer and it will distribute them among the machines.
CA does not always send a client a chain of certificates along with the main certificate — sometimes it only sends the main one, because often it is enough for browsers to confirm the domain name. In this case, you can get the certificate chain yourself:
- Download the root and intermediate certificates from the site of the CA that issued you the certificate.
- Create the file in any text editor.
- Inside the created file, place the contents of the certificates in the following order: root certificate, then intermediate certificates in order, the certificate for the domain in the end. Like this:
- Content of the root certificate (for example, CARoot.crt)
- Content of the intermediate certificate no. 1 (for example, Intermediate1.crt)
- Content of the intermediate certificate no. 2 (for example, Intermediate2.crt)
- Content of the certificate for the domain (for example, domain.crt)
2. Merge certificate files into PKCS12 #
Now you have all the files needed. There are several ways to merge them into PKCS12 format. Below we describe a common case — creating PKCS12 from PEM files.
1. Install OpenSSL. This is a library containing tools for working with SSL/TLS protocols. You can find installation links and instructions for working with OpenSSL on its official website.
2. Check if your certificate files are in PEM format. Such files must have the extension .pem, .crt, .cer or .key, begin with the line ----- BEGIN CERTIFICATE ----- and end with the line ----- END CERTIFICATE -----. To see the beginning and the end of a file, open it in a text editor.
3. If some files are not in PEM, convert them using OpenSSL. Enter the command in OpenSSL, replacing the text in square brackets with your names:
For a .crt, .cer or .der file
If your file is named “example.der” and you want to name the new PEM file “PEMcertificate”, then the command would be: openssl x509 -inform der -in example.der -out PEMcertificate.pem
For a .p7b or .p7c file
If your file is named “example.pb7” and you want to name the new PEM file “PEMcertificate”, then the command would be:
openssl pkcs7 -print_certs -in example.pb7 -out PEMcertificate.cer
4. Place the main certificate, key, and intermediate certificate chain (three PEM files in total) in the current directory.
5. To merge files into PKCS12, open OpenSSL and enter the command:
If your files are server.crt (main certificate), server.key (private key) and ca-chain.crt (certificate chain), and you want to name the new PKCS 12 file “server”, then the command would be:
openssl pkcs12 -export -inkey server.key -in server.crt -certfile ca-chain.crt -passout pass: -out server.p12
As a result, you will merge the key, certificate, and intermediate certificate chain into one PKCS12 file.
3. Base64 encode #
Encode the contents of PKCS12 file to base64. This can be done by entering the command in the console:
For Windows OS
If the path to your file is “C:\Users\Myname\server.p12” and you want to name the new file “code64”, then the command will be: certutil.exe -encode C:\Users\Myname\server.p12 code64.b64
A new base64 encoded file will be created. Open it in a text editor and delete the first and the last lines: ----- BEGIN CERTIFICATE ----- and ----- END CERTIFICATE -----. They are generated automatically and you don’t need them. The rest of the text will be the content of the Secret.
For Mac OS
If the path to your file is “Users/admin/Downloads/server.p12” and you want to name the new file “code64”, then the command will be: openssl base64 -in Users/admin/Downloads/server.p12 -out code64.txt
A new .txt file will be created with the base64 encoded contents of the PKCS12 file. This is the content of the Secret.
For Linux (must be executed in the directory of PKCS12 file)
If your file is named “server.p12” and you want to name the new file “code64” then the command will be: base64 server.p12 > code64
A new code64 file with the contents of the base64 encoded PKCS12 file will be created. This is the content of the Secret. The file can be opened using the command: nano code64.
How to Create a Load Balancer with an HTTPS Listener #
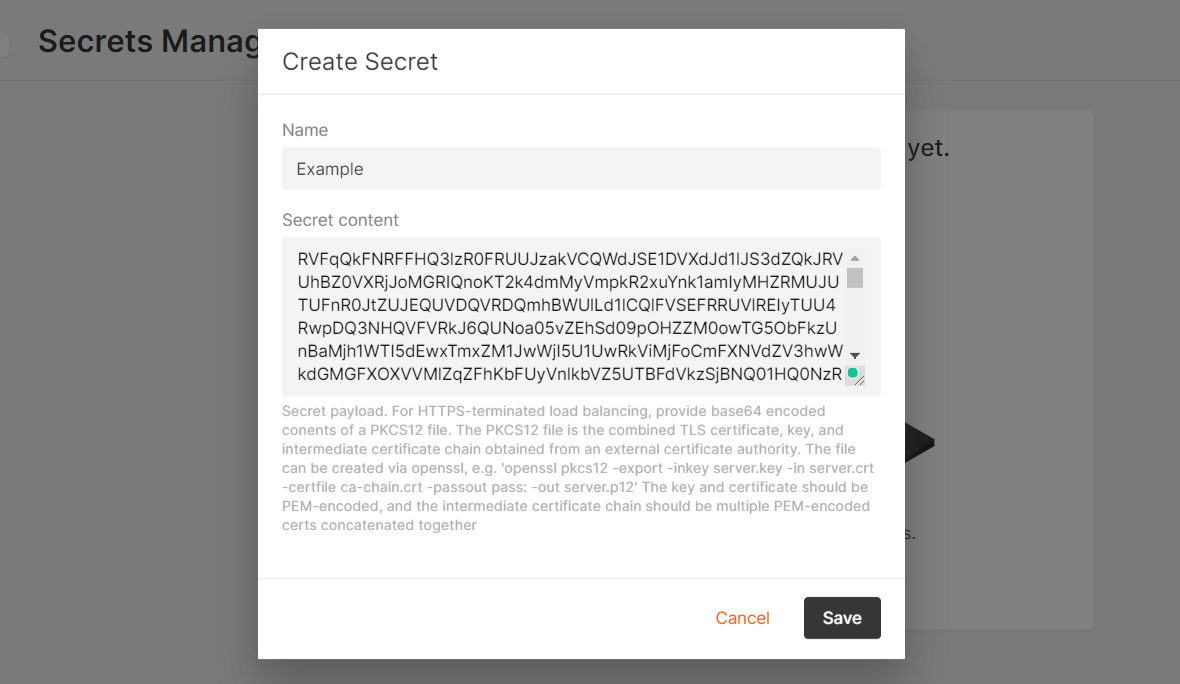
1. Add the base64 encoded content of the PKCS12 file as a Secret (in examples above it is the content of “code64”).
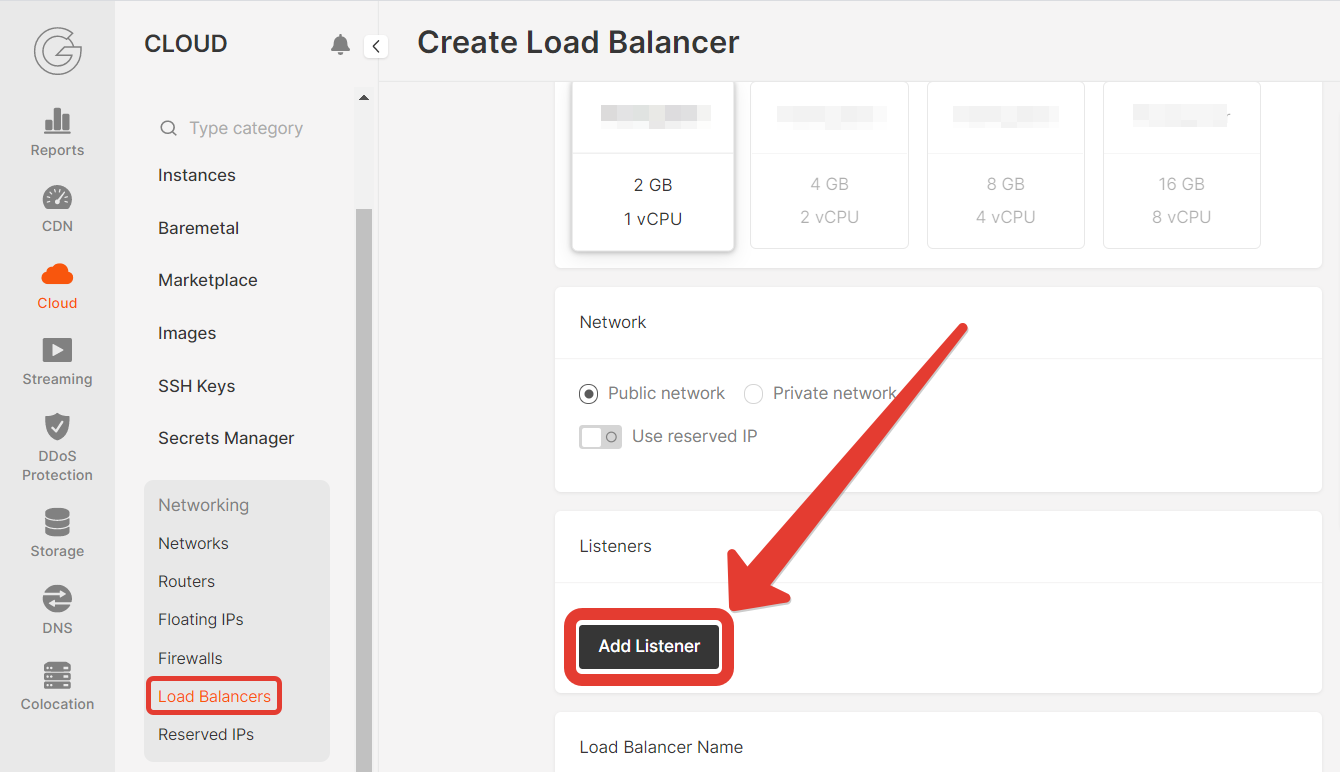
2. When creating or editing a Load Balancer, click “Add Listener”. In the opened window, enter the name of a new listener, select the “Terminated HTTPS” protocol and specify the desired secret below.
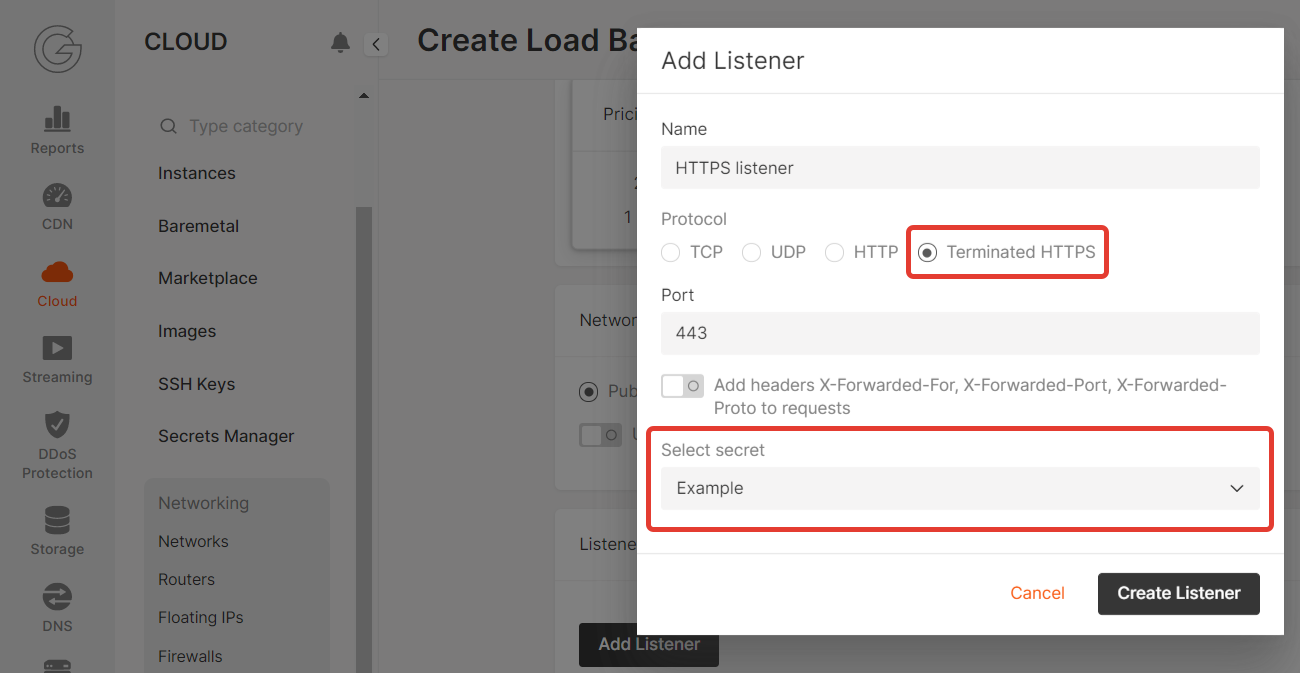
The listener will be created.